Steps I took in Creating a Digital Painting

CREATING ‘THE TREE TRUNK INN’

This image is titled ‘THE TREE TRUNK INN’ It depicts a tree stump converted into a roadside inn for for traveling bugs. A grasshopper, a ladybug and a firefly are arriving at the inn with their luggage. They are being led towards the inn by a guide while the inn keeper comes out with a sign to welcome them.

This is not a detailed step by step tutorial of how I created the image above, but an overview of my creative and thought process; what inspires me and how I bring different elements together to create a concept.

INSPIRATION

The creation of every piece of art, whether it’s created in a computer or done traditionally, basically starts with an idea. Something inspires or triggers the idea. Most creative ideas are born as a result of making connections and seeing relationships between often unrelated elements. For me, the flash of inspiration for this image came while I was doing research on deforestation, in preparation for a client project.

I came across images of tree trunks and stumps that had been left over by logging. Immediately the thought flashed my mind. What if I created an illustration of bugs living in a tree trunk? Well, there was nothing particularly extraordinary or creative about bugs living in a tree trunk, after all most soldier ants and other insects lived inside tree trunks, I knew I had to stretch my imagination further. This time my mind flashed to images of picturesque inns located in rural Europe.

I had seen these images on an Instagram page about tourism. I began connecting the inns and the tree trunks, and that was when the idea clicked! What if there was an inn carved out from a tree trunk? Such an inn could only serve miniature creatures and not humans. An inn that provided accommodation to travelling bugs? I would show a group of travelling bugs arriving at the inn at night and being welcomed by the inn keeper. Yes! Now I had an idea, but how do I bring it to life?

RESEARCH & GATHERING REFERENCE

How do I visualize my idea? It was time to do research and gather some reference images. I couldn’t settle for just any tree trunk or stump I found online, I had to search thoroughly for something interesting and unique. For the insects, I wanted bugs with interesting characteristics and features like grasshoppers, ladybirds and fireflies. Since the image is set in the late evening I loved the idea of having to show the fireflies bioluminescent glow, which would make the scene more interesting. The purpose of gathering all this reference images was not to create an exact replica of the reference image, as that would result in a rigid, lifeless and uninteresting composition. Such references serve the purpose of ensuring that the composition, while based on imagination, still remains authentic and true to real life.

ROUGH CONCEPTS

Now that I had enough reference images, I began to make sketches, exploring different ways of staging the scene, to create an interesting composition. I sketched the tree trunk to look like an inn, with a door and window carved out of the trunk. But I was not satisfied with having just one tree trunk. The composition was looking empty and boring! I added two other adjoining tree stumps to the left side of the major trunk to create the impression of an extended inn with extra rooms to accommodate visitors. Then I sketched the sign above the inn door that read: ‘The tree trunk inn’ I also added an overhead lamp above the sign, that would later illuminate the sign. The scene was gradually taking shape! Since the Inn was in the forest, I had to add some background foliage behind the trunks.

Now that I was satisfied with the design and placement of the tree trunks, it was time to sketch the characters. I opted for a triangular composition style for the insects. This technique can create some really interesting compositions, as it groups various related objects together in a sort of triangular shape while creating a sense of visual unity.

I composited the bugs over the trunk background, and the scene was almost done! One more thing needed to be added. I sketched in an additional bug at the doorway of the inn carrying a welcome sign.


PAINTING

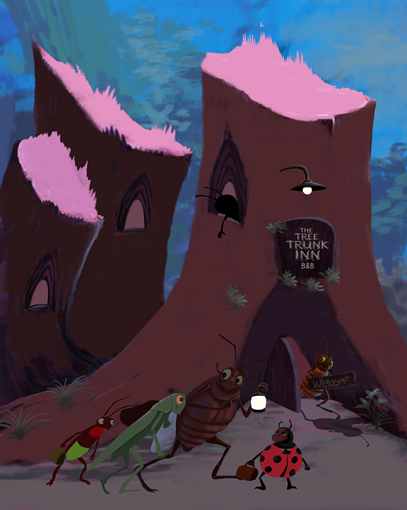
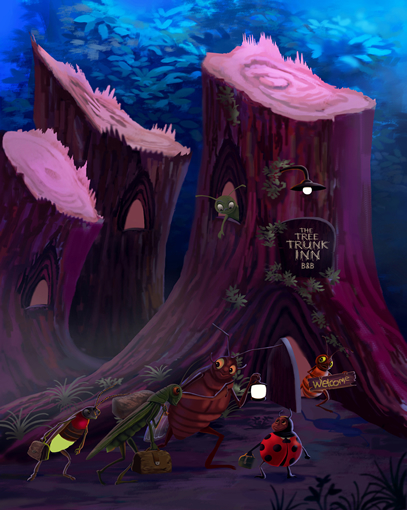
Now the sketch composition was complete, It was time to paint! I began to paint the image in the computer using my preferred favorite-Adobe Photoshop; an industry standard software that powerfully amplifies the creative process. I wouldn’t go in-depth into my painting process, as that would require an entire article. To reiterate, this is not a digital painting tutorial, but an overview of my creative process.

Every artist have their own unique approach and technique to creating digital art that work for them. Basically my painting process involves three major stages: First, filling all the characters in the scene with simple flat colors to establish the mood and color scheme of the image. Secondly, painting the details on the characters and the backgrounds and lastly adding effects and adjustments like light, color balance, brightness and contrast and in some cases fog.

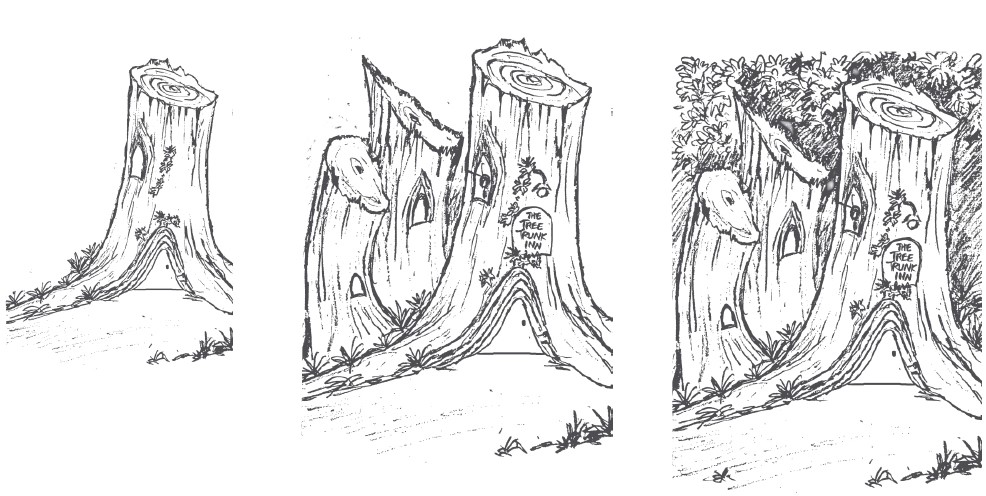
This process is by no means linear, often times I would find myself going back to adjust the look of the characters, the tree trunks, or repositioning the entire image. This constant tweaking ensures that the final composition looks interesting.

PHASE 1: Filling in the major shapes with flat colors

PHASE 2: Painting in the details on the trunks and the bugs and making foliage more pronounced.

PHASE 3: Adding effects and adjustments like light, color balance, brightness and contrast completes the Illustration.

error: Content is protected !!